
Here is a simple and modern outdoor patio table! Bringing the design together took some time, but once I nailed it down it was easy and affordable project. A huge thank you to National Hardware for sponsoring this post. I used National Hardware's reinforcement hardware to add stability and strength to this build.

As always use safety precautions when building. Measure twice cut once. This post is for entertainment purposes only.
Supplies:
12-2x6x8
1 package 2-1/2" pocket hole screws
2-1/2" wood screws
Stain or paint and seal
Wood Filler or pocket hole plugs
Wood Glue
Tools:
Table Saw
Miter Saw
Sander
Drill
Pockehole jig
Nailer (optional)
Planer (optional)
Before we get to the steps it's important to prep the materials to give it a more modern look.
Prep the boards:
-Rip 1/8" off each side of the 2x6 lumber.
-Rip one-2x6-x8 into 1-1/2" strips to create 3 strips.
-Use a planer if desired.
-Laminate with glue two -2x6x8 boards together. Repeat. You need 2 sets of two-2x6x8 boards laminated together. (Tip: to laminate two boards together use wood glue and clamps. Let the boards dry for 24 hours.)
Step 1: TABLE TOP
Cut seven @ 72". Cut 1-1/2" into two @ 36". Attach with wood screws the 36" boards to the seven -72" boards (use a spacer to create even spaces between the 72" boards).

Step 2:
Using National Hardware's 6x1.5x1/8 mending plates. Stagger the plates and attach with lag screws.

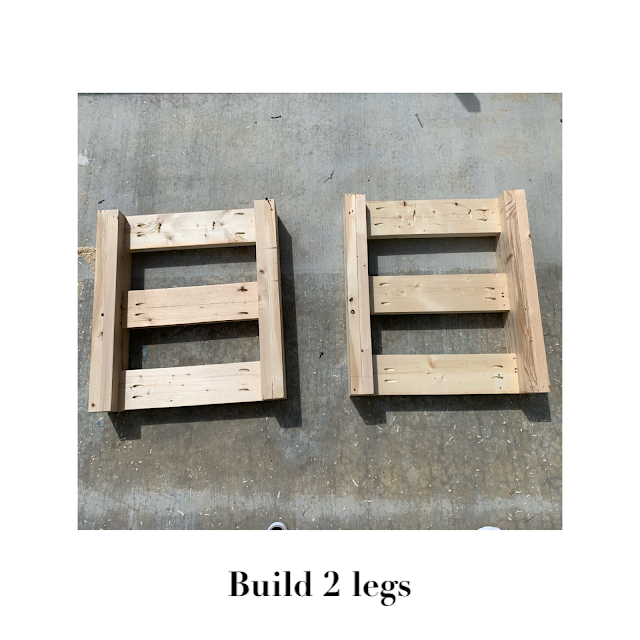
Step 3: BUILD THE LEGS
Using the laminated boards cut four @ 27-1/2". Cut six - 2x6 @ 19". Drill pocket holes in both sides of the 19" boards and the top of the 27-1/2" boards (to be drilled into the table top). Use a spacer under the 19" boards & attach with 2-1/2" pocket hole screws.


Step 4:
Attach the the legs to the tabletop using 2-1/2" pockethole screws. Once legs are screwed into tabletop cut & attach 47-1/2" stretcher with 2-1/2" pocket hole screws.


Step 5:
Attach 4 corner reinforcement brackets.


Step 6:
Cut & add trim using wood glue and a nailer. I used 2 -1-1/2" strips & scrap pieces for this.


Step 7:
Finish project as desired.

Hope you enjoyed it! If you decide to build one for yourself make sure you tag me on instagram using the #buildingahouseourhome I would love to see it!
Erin
Thanks for publishing such great information. You are doing such a great job. This information is very helpful for everyone. Keep it up. Thanks. Fire table Canada
ReplyDeleteReally, this is very important information which is shared by you. This info is meaningful and important for everyone to increase our knowledge about it. Always keep sharing this kind of info. Thank you. Office Furniture Fort Worth
ReplyDeleteThanks for publishing such best knowledge with us. You are doing such a great job. This info is very helpful for everyone. Keep it up. Thanks.candy table
ReplyDeleteAt this time, if you can use good medicinal materials and ingredients to strengthen hormones,wooden outdoor benches will be able to retain your youth and enjoy masculine power.
ReplyDeleteIt is a proficient article that you have shared here. I got some different kind of information from your article which I will be sharing with my friends who need this info. Thankful to you for sharing an article like this. teak wood dining table 6 seater
ReplyDeleteI would like to say this is a well-informed article as we have seen here. Your way of writing is very impressive and also it is a beneficial article for us. Thanks for sharing an article like this.built custom design furniture
ReplyDelete